My Cart

Getting started | Ecovacs

So, your new Ecovacs robot vacuum has arrived.  Great choice! 

Now, it’s time to get set-up.  It is pretty easy to get running, just follow the 10 simple steps below.

Plug-in the charge base.

Find a power socket with at least 70cm directly in front of it. Place the base firmly against the wall and plug it in.

Put the robot on charge.

Line the charger contacts up with the base, then turn the robot on.  There is a physical power switch on the robot.  

Download the Ecovacs Home app.

Download the app here, or find it in the app store.  Android | Apple

Once downloaded, create an account. You will need to check your emails to verify your new account.


Connect your phone to the right network.

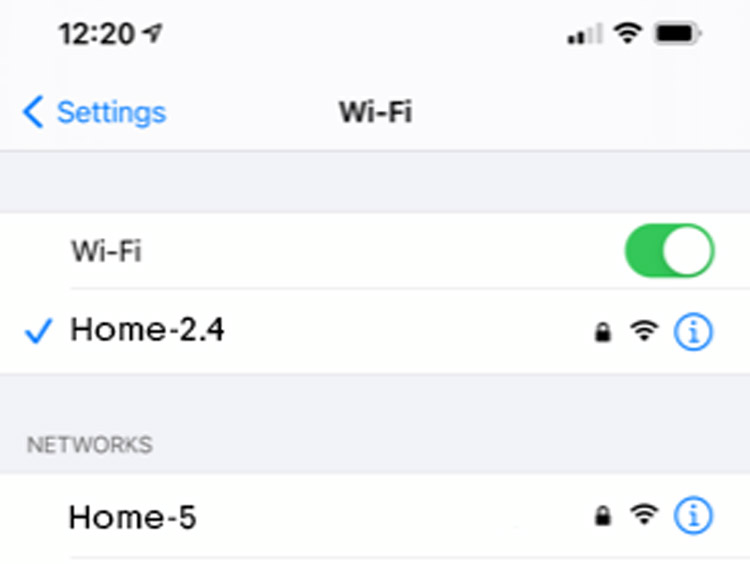
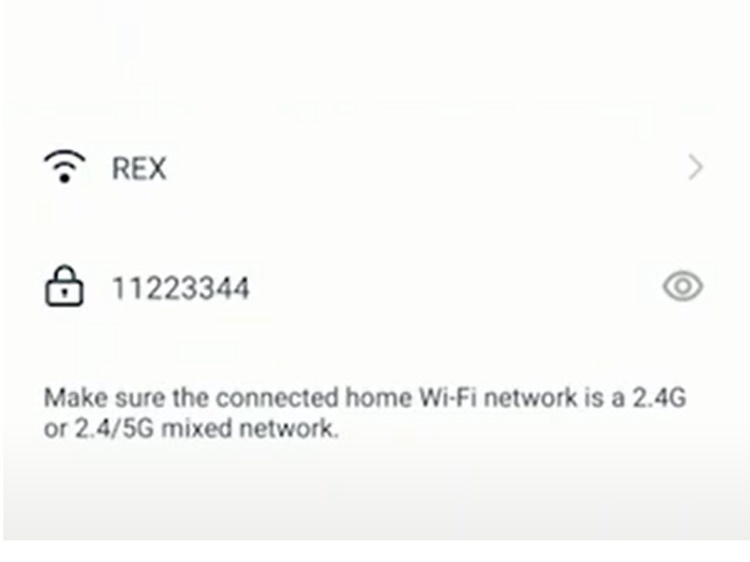
Most modern routers create 2 WiFi options.  Connect to the 2.4Ghz network (not 5Ghz).  Often the networks are named Network and Network_5. If you’re unsure or only have one network, continue past to step 5.

Log-in & add a robot.

You should now be able to log-in and add a robot.

Find the right robot.

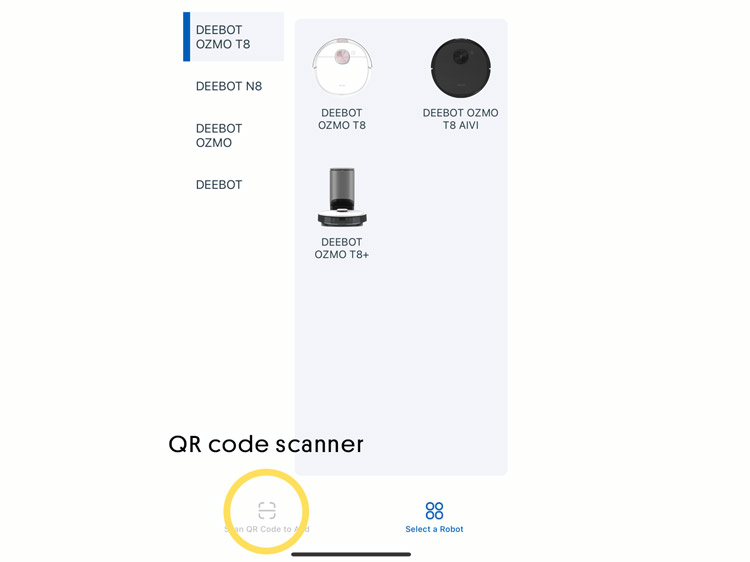
On the add robot screen, you will see a list of robots but the easiest way is to use the QR code scanner.  On the bottom of the screen there are 2 tabs – one will take you to the QR scanner.  

Find the QR code on the robot.

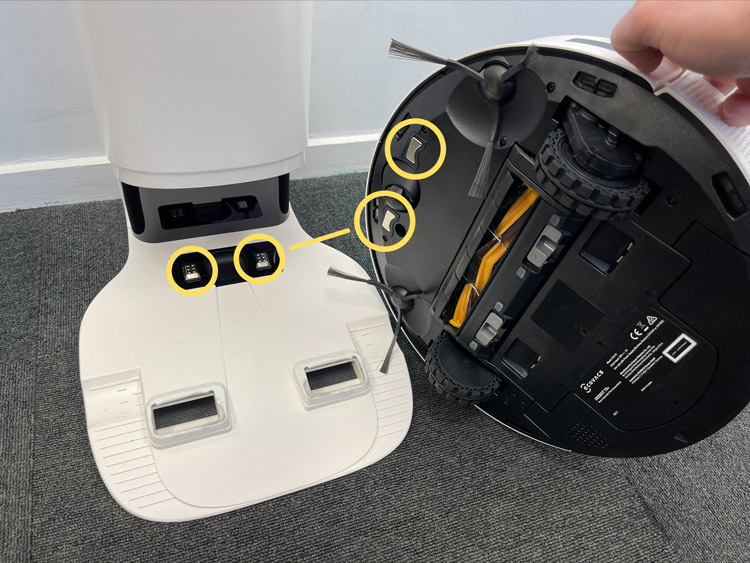
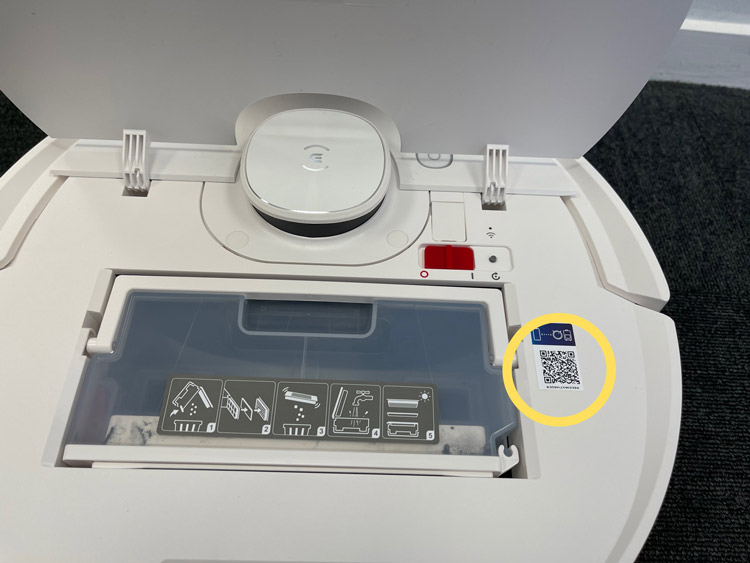
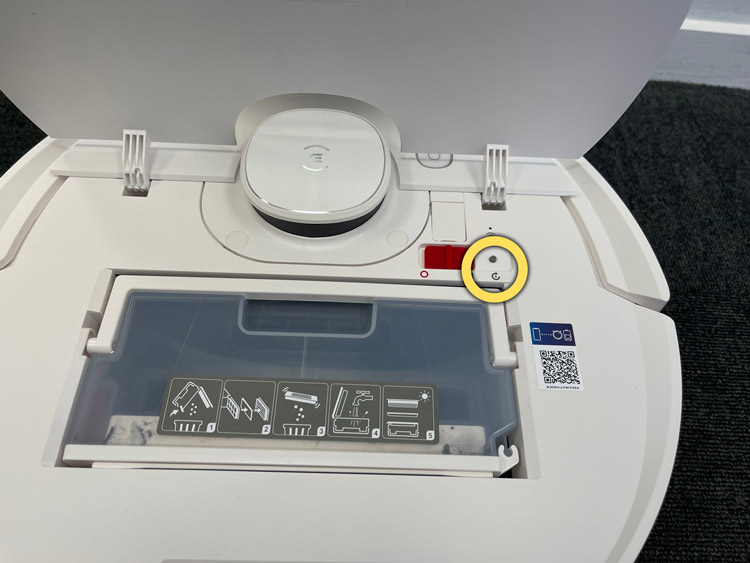
The QR code is located somewhere on the robot itself.  If the dust-bin has a cover that lifts up, it may be located inside.  Click next once you have scanned this.

Enter your WiFi password.

Note that this is case sensitive.  If you don’t know your WiFi password, there is often a sticker on the router.

Press the reset button.

This is normally located beside the power switch.  Hold it for one second until the robot tells you it is ready to connect. 

Name your robot!

Pick a good name for your new mate.  If you need some inspiration, you can read our list of suggestions

Once the connection process has completed, you're ready to do your first clean. Here are some tips to help:

Picture of Lachlan Murray

Lachlan Murray

One Response

Leave a Reply

Your email address will not be published. Required fields are marked *